8BitRam.dev


 Unity
Tools | Blender
Languages | C Sharp,
Unity
Tools | Blender
Languages | C Sharp,
 ShaderLab
Version Control |
ShaderLab
Version Control |  Git
/
Git
/  GitHub
Duration | Apr 2023 - May 2023
Team Size | 3
Roles | 3D Modeler, Programmer
GitHub
Duration | Apr 2023 - May 2023
Team Size | 3
Roles | 3D Modeler, Programmer
Before we get into the description of this project, lets cover some background first.
The Legend of Zelda: Four Winds is a fan project I came across while browsing. It is being directed
by Don Donahue, a writer and producer.
Please note that LoZ: Four Winds is a nonprofit, unofficial fan project
that is not intended for commerial use. The Legend of Zelda (LoZ) is property of Nintendo Co., Ltd. and LoZ: Four Winds is
a fan project that is not connected in anyway to Nintendo Co., Ltd.
LoZ: Four Winds was created purely for enjoyement and appreciation of the game series.
To find out more about the producer, check out Donahue's
Twitter,
Instagram,
and Reddit or check out the
game's website for more info on Four Winds!
After getting a grasp of what Donahue's vision was for the project from some of their comments, I privately reached out to see if a programmer was currently working on Four Winds. To my surprise, the producer had not yet sourced a developer, & was eager to see what I could produce. After establishing email correspondence, I discussed requirements with Donahue and got started on the first sprint. Let's dive into what was developed for this 2-week sprint.
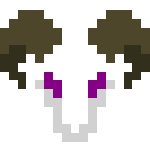
Beginning with modeling, I established a mesh for the player character. Reusing the arms from Lock & Reload, I was able to quickly map out the bones for animating. This let me create the initial idle and walk animations. Some time was spent attempting to combine the skirt with the walk animation in a natural manner. After a few days of trying various methods (Bones on Dampened Track, Bone Collisions, Shape-Keyed Animations), I decided to hide the skirt for the initial model & have it be part of a later sprint. Here is the model rendered in Blender, relatively unchanged from its initial state:
While working on the model, I was also researching methods of creating 'toonlike' shaders, recalling methods I have previously seen for visuals in games like Guilty Gear & WindWaker. I was aware these effects were typically achieved with Vertex Lighting, an early inexpensive approach to realtime lighting in videogames. Since I had never worked with Unity's ShaderLab before, I followed a tutorial on Toon Shaders to get started, which can be found here. I also referenced the ShaderLab docs to familarize myself with it's predefined variables and syntax, mainly sections within "Writing vertex and fragment shaders".
Many elements of my custom shader share components with the tutorial shader, utilizing the Blinn-Phong Reflection Model. I also added some options to toggle Specular Reflection & Rim Lighting for further material customization. With the barebones for the player model, animations, and toon shader established, I worked on ironing out issues with integration into Unity.

The rest of the sprint mostly consisted of testing and debugging the prototype. This time was generally split between rigging the player camera & controls, and debugging issues with my shader's shadow pass. To aid with testing out the controls & shaders, I created some assets for previewing my changes. I modeled the Fierce Deity blade (shown on right), originally appearing in Majora's Mask, for testing my shader with metallic objects.

I also modeled a signpost for testing target lock-on functionality (shown on right). I finished up the default implementation of target lock-on & established the skeleton for an 'in-range' target lockon. The decorative text on the sign uses WindWaker's Japanese Hylian, serving as a temporary texture until the final decorative text is selected. Check out the video below to see how these components worked with each other at the end of the first sprint.
After conversing about accomplishments of the 1st sprint & the goals for the 2nd sprint, I started on implementing the water's shaders. Having an early implementation for these shaders will make issues with floating objects and water clipping easier to identify. In order to simulate convincing waves, I combined my previous 'toon' shader with a CatlikeCoding tutorial on Gernster Waves (otherwise known as Trochoidal waves). After several iterations, the toon wave shader was complete. Here is a sample at what the wave shader can produce:
With the waves shader functional, I moved on to giving the flat water surface a texture distortion & directional flow shader. This shader is a combination of two flow tutorials on CatlikeCoding, more specifically the Texture Distortion and Directional Flow tutorials. Like the wave shader, the appearance can be highly customized based on the input parameters, allowing for the shader to be capable of simulating fast-moving, sluggish, & standing water. Here is some of those different settings on a flat plane:
One key difference between these shaders is how they are written. The wave shader is written as a vertex and fragment shader, whereas the flow shader is written as a surface shader. While surface shaders are templates for generating vertex and fragment shaders, they will often use predefined macros from ShaderLab. These macros can cause conflicts when attempting to use a custom vertex/fragment shader in another pass. With little progress made on combining these water shaders, I shifted to modeling.
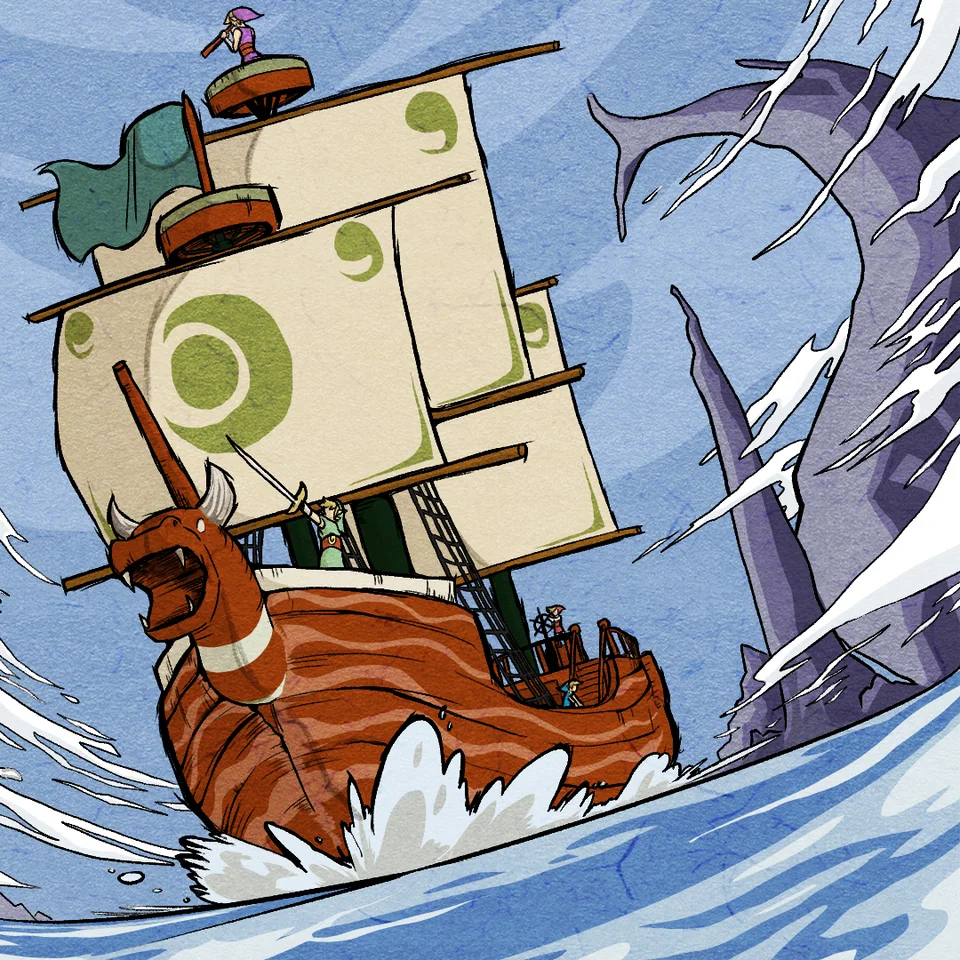 Using this concept art (shown on right), created by story artist
Silas Martin, I started to create the coop vessel.
This remainder of the sprint mostly consisted on working on the ship's model, with a bit of extra research sprinkled in.
Anything I stumbled upon while doing various tasks for modeling, like water clipping into the hull of ship on the surface,
would be added to a Trello board for task tracking and management.
Tasks will typically contain links to relevant research, such as the Unity shader docs on
Stencils
to address the clipping issue mentioned above.
Using this concept art (shown on right), created by story artist
Silas Martin, I started to create the coop vessel.
This remainder of the sprint mostly consisted on working on the ship's model, with a bit of extra research sprinkled in.
Anything I stumbled upon while doing various tasks for modeling, like water clipping into the hull of ship on the surface,
would be added to a Trello board for task tracking and management.
Tasks will typically contain links to relevant research, such as the Unity shader docs on
Stencils
to address the clipping issue mentioned above.
The initial model is composed of several parts; the hull, the figurehead, the 3 masts, & finally the bowsprit. This composition should make it easier to transform this existing boat model into other unique ships with differing mast placements & figureheads, among other properties. You can examine the vessel's current model in the figure below:
As alluded by the caption, this model still needs some major work to prepare for 'testing' the waters of the sample scene. For the exterior, The upper deck railing & the anchor windlass (the hoisting mechanism), still need to be modeled. Textures are currently placeholders & will be revamped to align with the art direction. Fleshing out a basic interior of a boat will also aid with catching errors with my Stencil implementation in the future, but is not required for testing at this time.
 Instead, my next sprint will be focused on unifying the mechanics setup in the project.
This will include adding in the vessel's helm & animations for the player manning it.
In preparation for this, I modeled the helm wheel shown on the right. After adding the
helm to the vessel, work can continue on finishing up the target implementation for
easy access to steering. Then I can implement our bouyancy script, ensuring it works
with my wave simulation shaders. With all of this done, I can start implementing rudimentary
sailing mechanics for the ship.
Instead, my next sprint will be focused on unifying the mechanics setup in the project.
This will include adding in the vessel's helm & animations for the player manning it.
In preparation for this, I modeled the helm wheel shown on the right. After adding the
helm to the vessel, work can continue on finishing up the target implementation for
easy access to steering. Then I can implement our bouyancy script, ensuring it works
with my wave simulation shaders. With all of this done, I can start implementing rudimentary
sailing mechanics for the ship.